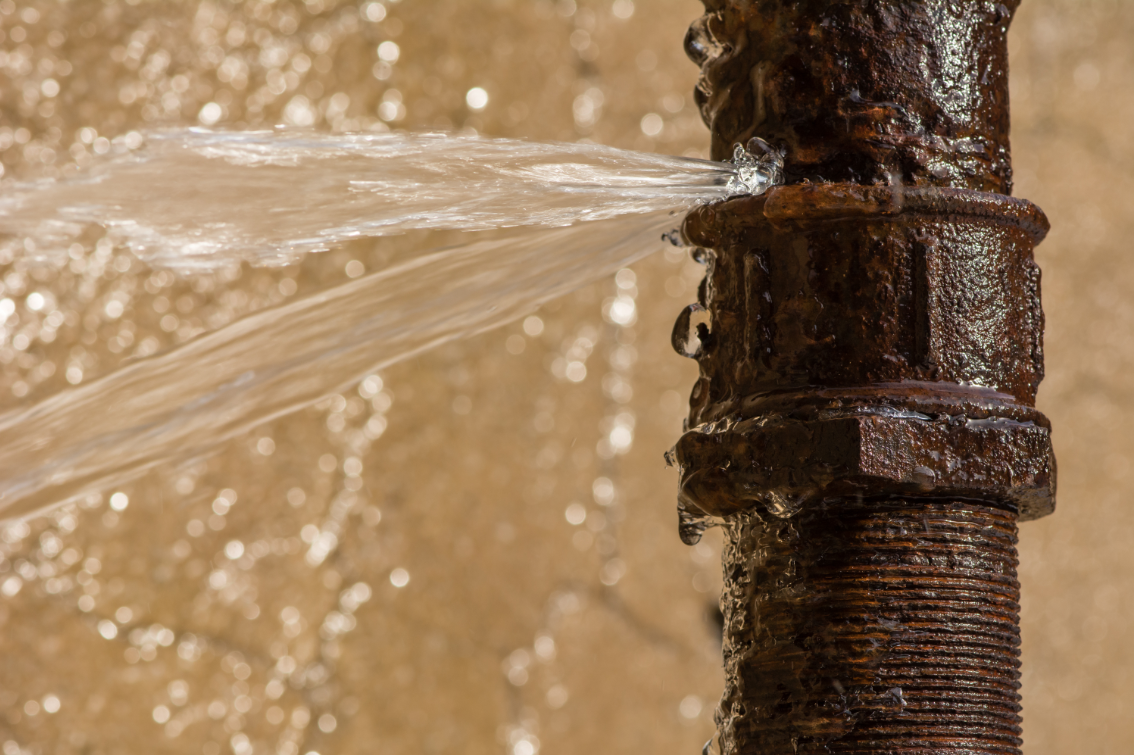
Fixing a leaking copper water pipe is a simple process and you’ll save a bundle. In the Pittsburgh area, plumbers charge 80 dollars and more just to come out to take a look-see and 90 to 150 per hour for doing the work! You pay for materials and do it yourself for a fraction of the cost.
A large leak can create quite a mess if not caught quickly. In these instances, it makes sense to call in a professional home cleaning service to assist with the clean up.
To get started, you’ll need to have a few simple tools on hand. Let’s start by listing the tools and supplies you’ll use which can be found at your local Lowes, Busy Beaver or Home Depot.
1. Copper pipe cutter
2. Flat metal file
3. Small half round metal file
4. Propane torch
5. Solder
6. Flux (soldering paste) with brush
7. Emery Cloth
8. Copper pipe (usually 1/2 inch diameter)
9. Copper fittings (coupling, corner, T, cross) maybe shutoff valve
10. Vice grip pliers
11. Fitting brush
12. Pliers (optional)
13. A slice of bread (yep the kind you eat)
Assess the leak to determine what pipe and fittings to buy. Is the leak in a straight run of pipe or a corner fitting? A run of pipe needs two coupling fittings and a short piece of pipe whereas leaks at corner joints, T’s or shutoff valves need those fittings or valves replaced. If the shutoff valve is leaking slightly around the stem, tighten the stem nut 1/4 of a turn with pliers which should stop the leak.
9 Simple Steps To Fix Leaky Pipe Repairs
- Begin by closing a shutoff valve that leads to the leak or shut off the water at the main valve where your water line enters your home.
- To remove the piece of leaking pipe or fitting with your pipe cutter, open the pipe cutter by twisting the knob on cutter counter-clockwise. The two rollers spread apart when twisting the knob. Spread the rollers apart enough to slip over the pipe you are cutting and twist the knob clockwise until rollers seat on the pipe then tighten the knob 1/4 turn more. Hold knob and roll pipe cutter one revolution around the pipe. You’ll notice a small groove on the pipe as the cutter cuts into the copper. Tighten knob clockwise 1/4 turn more, then make another revolution. As you continue this two-step process, you’ll cut deeper into the pipe until you cut all the way through it.
If the leak is in the middle of a pipe, you’ll need to cut on the opposite side of the leak to remove the bad piece. If the leak is a fitting or valve you’ll need to cut on the other side of the fitting or valve to remove it. You may need to cut out a few extra inches of the pipe to be able to make repairs by inserting a small length of new pipe, especially when the piece removed is too short after removing the leaky part. Think of taut rope cut in the middle and trying to tie the ends together. If the rope was taut and hasn’t any play you’ll need to add more rope to tie it successfully and it’s same with the copper pipe. Small amounts of water run out of the pipes when cut. This is normal and desirable. Water and dirt are enemies when making copper pipe repairs. More on this later.
- Repairs in a run of pipe need two couplings, one on the left and one on the right with a small pipe between them. Measure the gap left by the piece just cut out and subtract one inch from the distance to get your length of pipe needed for this repair. Couplings will each take up 1/2 inch on each side. Likewise, figure one inch for corner fittings or shutoff valves. Use your pipe cutter to cut the length of pipe you’ll need.
- Use a flat file to file all outside edges removing burrs and edges where you made your cuts. Use a half round file to file all the inside burrs on both older and newly cut pipes. This allows easy fitting of the pieces and prevents restricting water flow. Then dry fit the pieces by slipping one fitting on each end of your newly cut pipe then fit the other end of each fitting on old copper pipes. The copper pipes should go into the fitting 1/2 inch. Always dry fit your assembly before soldering.
- When the dry fit works disconnect all the pieces. As mentioned, dirt is one enemy of copper pipe repairs. Using emery cloth, shine all the ends of the older and newer pipes you just cut. Blow off the dust created from the emery cloth but don’t touch the copper ends after using the emery cloth on them. If you accidentally touch the pipe ends after shining with the emery cloth, it’s important to apply the emery again to remove finger oil. Push fitting brush into each fitting or valve and twist several rotations to clean the inside of copper. Remove the brush and blow out paying attention to not touch any areas you’ve just cleaned.
- Wait until the old pipes stop dripping. Pinch a piece of bread into a ball the size of a large marble and stuff the end of the old pipe with the ball. Do the same on the other old pipe where you cut it. Water is the second enemy of copper pipe repairs, but the bread trick stops water from dripping when soldering the joint.
- Using the brush that comes with the flux, paint the paste on the outside of the pipes where you shined them and on the insides as well where you cleaned with the fitting brush. Apply the paste all the way around the pipe and the inside fitting surfaces. If you’re making an inline repair, you can use vice grips to hold the newly cut pipe to solder the couplings on each end before attaching the pipe to the older existing pipe. After you’ve covered each recommended surface with flux, reconnect all pieces of your pipe assembly to prepare for soldering them.
- To make a shutoff valve repair remove the handle on the valve with pliers to prevent damage to the rubber washer caused by the heat. Unroll solder until a straight piece extends about six inches. Light your torch and adjust the gas flow until a blue flame is seen inside of the regular lighter colored flame. The blue flame is very hot. If you’re making a coupling repair, bring just the tip of the blue flame to bear on the coupling near the edge where the copper pipe goes into the coupling. Move the flame from the coupling to the pipe for a few seconds, then back to the coupling. Allow the flame to heat the coupling about three times as long as the pipe when you’re moving back and forth from the coupling to the pipe with the flame. Occasionally touch the solder to the pipe joint to see if the solder melts. The copper will change slightly in color as it gets close to the correct temperature. Don’t melt solder with the flame but do allow the pipe and fittings to get hot enough to melt the solder. When the solder begins to melt, remove the flame while feeding more solder to the pipe joint. In a few seconds, you will see solder forming a bead around the pipe joint. When the solder is all the way around the pipe stop feeding the solder because too much solder may cause it to run into the inside of the pipe which might restrict the water flow. The flux draws the solder into the fitting and around the pipe making a leak proof repair. Solder both ends of an inline repair while holding the assembly in vice grips. Let the assembly cool before soldering it to older pipes. Soldering corner fittings and valves the same way as straight fittings. Valves made with heavier metal can take longer to heat before the metal is hot enough to melt solder. Wait for your work to cool before re-installing the shutoff stem for any valve replacement. Likewise, wait for repairs to cool before using.
- Open shutoff valve and inspect for leaks. The bread stuffed into the pipes flushes out of the lines when you turn on your water.
What To Do With All The Money You Saved
Congratulations! You’ve completed a professional plumbing repair saving over 95% of the cost which is mostly labor charged by your local plumber! One tip to remember is that soldering is a skill to acquire so practice soldering a few times before making repairs. Soldering is easy but can take a few times to get the knack of it before you’re proficient.