
How to Wash Your Washing Machine
Have you ever thought about what your washing machine does each time it cleans your clothes? Most of the dirt and grime goes down the drain when the machine cycles through its washing modes, but surprisingly not all of it! I had a wake-up call several years ago when I looked into our top loaded washing machine and noticed a light brown ring around the washing basket.
Our Repairman’s Raging Reprimand
As luck would have it way back when the washing machine broke down and we had to call in the repair person to have a look. It turned out the problem was only a small inexpensive switch that activates the machine when the lid is closed.
However, I decided to take advantage of the opportunity that presented itself by asking the repair person what was causing the light brown ring in the washing drum. He mumbled something about our Pittsburgh air being dirty before informing me that our washing machine was dirty and needed a good cleaning! Imagine that, all the years I’d used our washing machine (yes I do laundry) and never once considered that it needed a good cleaning from time to time.
The repairman also informed me that not cleaning the machine on a regular basis can cause unnecessary repair costs or, worse yet, even reduce the useful life of the machine. With the cost of a new washing machine only getting higher and quite expensive for a high-quality machine, I thought it time for me to investigate the matter of cleaning the family washing machine.
My research was quite extensive but definitely worth it. I thought I would share what I discovered with you to help you prolong the life of your machine and possibly reduce the number of house calls needed by the local repair person to keep your machine running well.
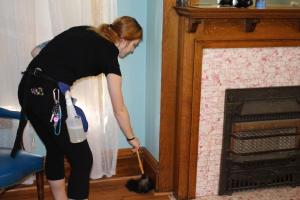
The best cleaning service companies keep a few things in mind when cleaning the outside of a washing machine such as cleaning under the lid and using care around the control panel with its delicate knobs and controls. There are a few other important points to consider when you’re attempting to provide a deeper clean for your washing machine.
Remember, there are parts you can see and parts that you can’t see that will need to be cleaned. Not to worry the steps and procedures needed are quite easy to perform, in fact, the machine will do most of the work for you. You should sanitize the machine as well which will help the machine to smell cleaner and actually help it to make your clothes smell fresh when they’ve been washed.
The Real Problem – Dirty Clothes
To understand the problem we are going to solve, it’s important to understand the conditions that caused it in the first place. Let’s consider what is being put into the washing machine each week.
It turns out that the average clothing worn by an adult in a week is somewhere between 16 to 18 pounds. This doesn’t account for things like bath towels, hand towels, washcloths, sheets, blankets and pillow cases, or an occasional sweater, swimming suit, bathroom throw rug or a pair of tennis shoes.
Active exercising adults will obviously use more clothes each week. The average child uses about 14 to 16 pounds of clothing each week. They may use more items, but the weight of the clothing is less than an adult’s clothing of comparable material.
To sum it all up, figuring roughly for a family of 4, you’ll wash somewhere between 60 to 70 pounds of clothing each week or about 5 to 6 loads of washing. That’s quite a lot of washing each and every week!
All this clothing is filled with dirt, hair, dust, dead skin cells, dander, sweat, dust mites, bacteria, germs and on some pieces of clothing viruses when we’re fighting the flu or some other illness. Pretty gross when you think about it. To this mixture, we can add some daily deodorant, perfume or cologne, food spills, an occasional grass stain and I could go on but will stop
for the sake of time.
We place all this mess into a machine and hope to add hot water (but must use cold at times) and a detergent that creates a residue which sticks to and helps to hold everything against the washing machine drum. When the washer has cycled through its complete process we remove the clothes and usually put the items into a dryer, but without drying the inside of the washing machine’s drum. This allows more bacteria, mold, and mildew to build up over time which in turn causes the smell often found in the washing machine.
I hope by now you’re convinced you’ll need to periodically clean your washing machine. I wasn’t trying to be gross and I hope you continue to read, but I felt it was necessary for you to understand the total nature of the problem before we consider what to do about it. If you’ve read some of my past articles you’ll know that I’m a huge proponent of preventative maintenance because I believe it’s always best to nip it in the bud as Barney of Mayberry used to say.
Sanitize First For A Stellar Start
To clean your washing machine, we can start on the inside and by inside I also mean places you can’t readily see such as inside the drain hose. We can sanitize the machine with good old bleach which will give it a clean smell but more importantly it will kill a host of bacteria, mold, mildew and even viruses if they have found a home in your machine. This should be done monthly if possible by not less than quarterly.
Begin by wiping out the inside of the plastic or stainless steel drum with a damp cloth to remove the most grime possible before resorting to the bleach. Next, select the longest cycle your machine has and select the hottest water temperature your machine has. We’re going to give your machine a break by not putting in anything to wash, meaning this wash is for the machine only.
Start the cycle and add the regular amount of detergent and one cup of bleach to the washer load. Let the machine fill and agitate for several minutes before stopping in mid-cycle to let the solution dwell inside the drum for 30 minutes or so giving the bleach time to work its magic. This will sanitize the machine, especially the drum and agitator.
After the dwell time is completed, restart the machine and let it finish its cycle. As the washing cycle drains from the machine it will first sanitize the drain hose, then the rinse cycle will rinse out the drain hose. As a final precaution, run a shorter cycle with plain water to ensure all the bleach has been removed from your machine.
Sticky Soap Scum, Dirty Detergent And Mineral Mayhem
We’ve taken care of the largest problem, but there is still more to do. All washing machines eventually have a buildup of soap scum and if you have hard water running through your lines the soap scum builds up faster.
Another issue that happens all the time is the detergent residue which is left behind after each wash. Some detergents produce more residue faster than others, but all do to some extent. Another potential problem for homeowners with hard water is the buildup of lime scale and calcium hard water produces which can block hoses meaning an expensive repair.
For these three problems, we again turn to our washing machine and let it clean itself with a bit of help from us. The frequency for this cleaning procedure should be around 5 – 7 weeks, if possible, but again not less than once every 3 months. All three of these concerns can be addressed with one simple and inexpensive solution – vinegar, yes indeed, we resort to a natural ingredient for this cleaning.
Once again start a long cycle using the hottest water setting your machine has, and to this add 4 or 5 cups of white distilled vinegar but without any detergent. Let the machine fill and agitate for several minutes then stop the cycle as before. For this procedure, you can let the mixture of vinegar and hot water sit for an hour giving the acid in the vinegar time to dissolve and break down the soap scum, detergent residue, and hard water deposits before being rinsed down the drain.
After the one hour of dwell time, start the cycle up again and let it run to completion. As a final precaution, run a shorter cycle with plain water to ensure all the vinegar has been removed from your machine.
What’s Left When Washing The Washing Machine
Three other areas come to mind as far as cleaning the internals of the washing machine – the bleach dispenser, the fabric softener dispenser and the detergent dispenser tray. It’s much easier, if possible, to remove these dispensers and wash them in the sink with hot water and a bit of dish soap. A toothbrush is a handy tool to have on hand which can be used dig into the nooks and crannies on these small dispensers.
After a brisk scrubbing, rinse with cool clear water to remove the dirt, grime, residue and remaining soap.
If your dispensers aren’t removable, don’t despair. Oil based liquid fabric softeners will often clog the tiny dispenser holes preventing the softener from entering the load when called for. A simple and effective way to clean these parts is to flush them with the white distilled vinegar.
For an extra punch, warm the vinegar in a pot your stove or in your microwave first. The heated vinegar will dissolve the clogs more effectively than vinegar at room temperature. Pour about one cup of the warm vinegar into each dispenser and run your machine through a normal cycle to clean and flush out the dispensers.
Thinking Outside The Box
The final step is to clean the outside of your machine with an all-purpose cleaner and a microfiber rag. In my home, the biggest culprit on the outside of the washing machine is lint, but that’s not to say that dust and dirt may be seen as well. Before spraying with all-purpose cleaner, wipe the dust and lint off with a dry rag first because spraying a lot of dust or lint will only make a larger mess meaning more work for you.
When cleaning the exterior of your machine, stay clear of abrasive cleaning chemicals such as powdered cleansers or any abrasive cleaning tool such as a steel pad to keep from scratching the paint. Use caution when cleaning around the switches and timer. These delicate devices can be ruined if they get wet meaning an expensive repair bill will find its way into your mailbox.
Tip: For top loading machines, don’t forget to wipe under the lid and around the top of the washing drum.
Tip: You can slow the buildup of mold and mildew by keeping the lid or door opened when your machine is not in use which will aid in air drying the interior of your machine. Mold and mildew need moisture to thrive.
Tip: The smell often found on front loading machines is usually from the rubber door seal. Use a mold and mildew cleaner by spraying the rubber door seal and let it sit for a few minutes before wiping it dry with a microfiber rag. This should be done weekly to prevent any issues from starting.
Tip: Wet clothes left inside your machine will cause the mold and mildew smell to occur. Promptly remove wet clothes from your washer when the cycle is completed.
I hope you enjoyed this article on how to clean your washing machine. If so why not share it with others you know? Please feel free to comment below and share any ideas you may have about how you care for your washing machine.

1 Comment
Bette
Thank you for the complete details on How to Clean the Washing Machine. I have been using my Machine for 48 years and this year 2019, it has given up a moldy smell . I always close the lid after each use. I never cleaned it before. It’s
(after-all) a Washing Machine. But the smell was so bad that I did use Bleach in the machine with my White clothes and Hot Water. Then leaving the lid slightly ajar when it was done. Thinking that would help it recover. It did Not. I have tried the Bleach & Rinse route this morning. But I have to wait until I buy the White Distlled Vinegar for the 2nd Part of your cleaning instructions. I Hope it works . I always Shut Off the Water Hoses after I have Finished washing my clothes. Thinking that would prevent problems of hoses breaking. Thank you for helping to correct my mold problems.